Creating a Date Input Field

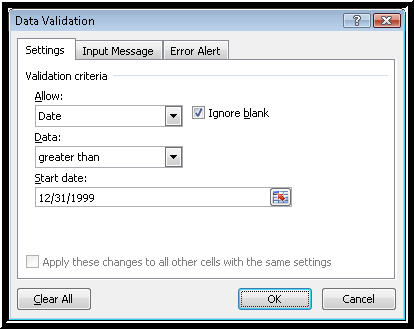
Picture of the date input options in the Settings page of the Data Validation dialog box in Excel
Follow the same procedures as previously described but this time create a Date Input field in a cell. Also, in this instance, use the Error Alert page to give the end-user a warning if the input is incorrect.
- Move to an empty cell in the worksheet and open the Data Validation dialog box.
- Press TAB to move to the Allow combo box for Validation Criteria. Choose "date" in the list and then press TAB to move to the Data combo box.
- For this example, assume the company was created in the year 2000, so choose "greater than" as the data validation and press TAB to move to the next control, which is the Start Date.
- Enter a date of 12/31/1999. This prevents anyone from typing a date prior to 01/01/2000.

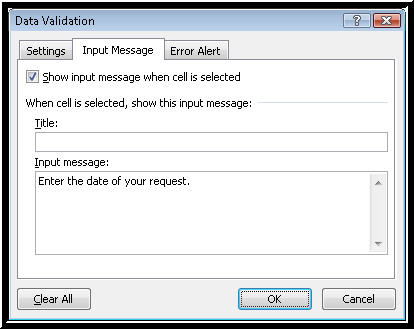
Picture of the input message options for a date field
- Press CTRL+TAB to move to the Input Message page.
- Press TAB to move to the "Show input message when cell is selected" check box and make sure it is checked.
- Move to the Input Message edit box and type something like the following: "Enter the date of your request."

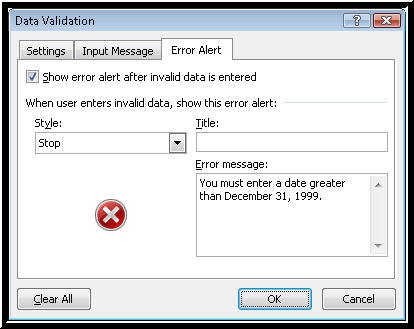
Picture of the error alert options for a date field
- Press CTRL+TAB to move to the Error Alert page.
- Press TAB to move to the Show error alert after invalid data is entered check box, and make sure it is checked.
- Press TAB to move to the Style combo box and choose Stop.
- Press TAB to move to the Error Message edit box and type in something like the following: "You must enter a date greater than December 31, 1999."
- Press TAB to move to the OK button and activate it to close the Data Validation dialog box.
Prior page
Next page


